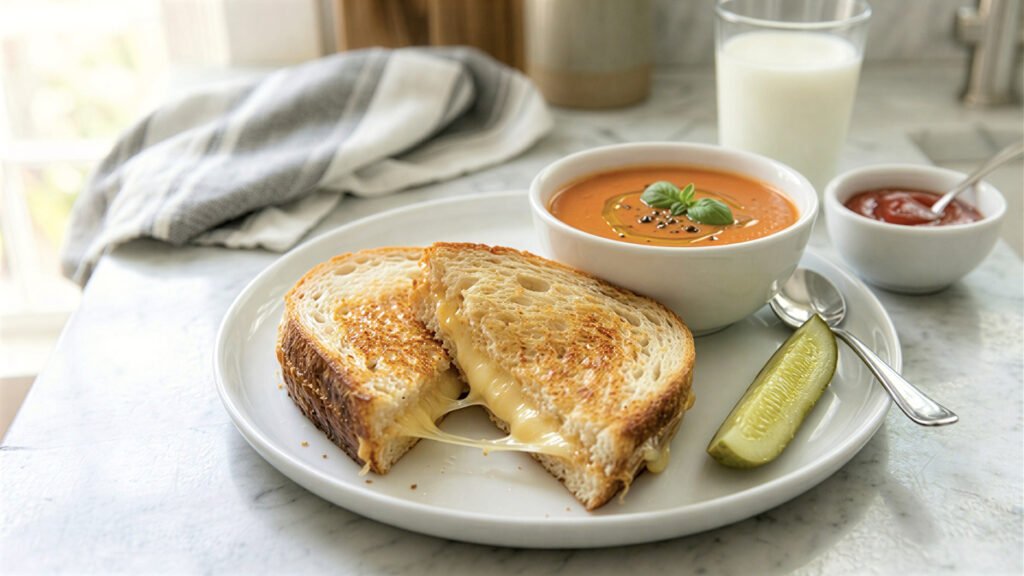
Making a great cheese sandwich doesn’t have to be complicated. Whether you’re new to the kitchen or just want a quick, tasty snack, this no-fail cheese sandwich recipe has got you covered. With just a few simple ingredients and easy steps, you can have a soft, melty sandwich ready in minutes. No more dry bread or unmelted cheese—every bite is warm, cheesy, and delicious. It’s perfect for breakfast, lunch, or anytime you need a quick bite.
Simple Cheese Sandwich Recipe for Busy Mornings

No-Fail Cheese Sandwich Recipe for Beginners
Description
This easy cheese sandwich is perfect for beginners. Made with just bread and cheese, it can be prepared in minutes. Enjoy it cold or toasted for a warm, melty grilled cheese. A simple, budget-friendly breakfast or snack loved across America.
Ingredients for Cheese Sandwich
Instructions for Cheese Sandwich
Step 1
-
Get Your Ingredients Ready
Gather everything you need: 2 slices of bread, 1–2 slices of cheese, 1 tablespoon of butter (optional), and a pinch of salt and black pepper if you like.
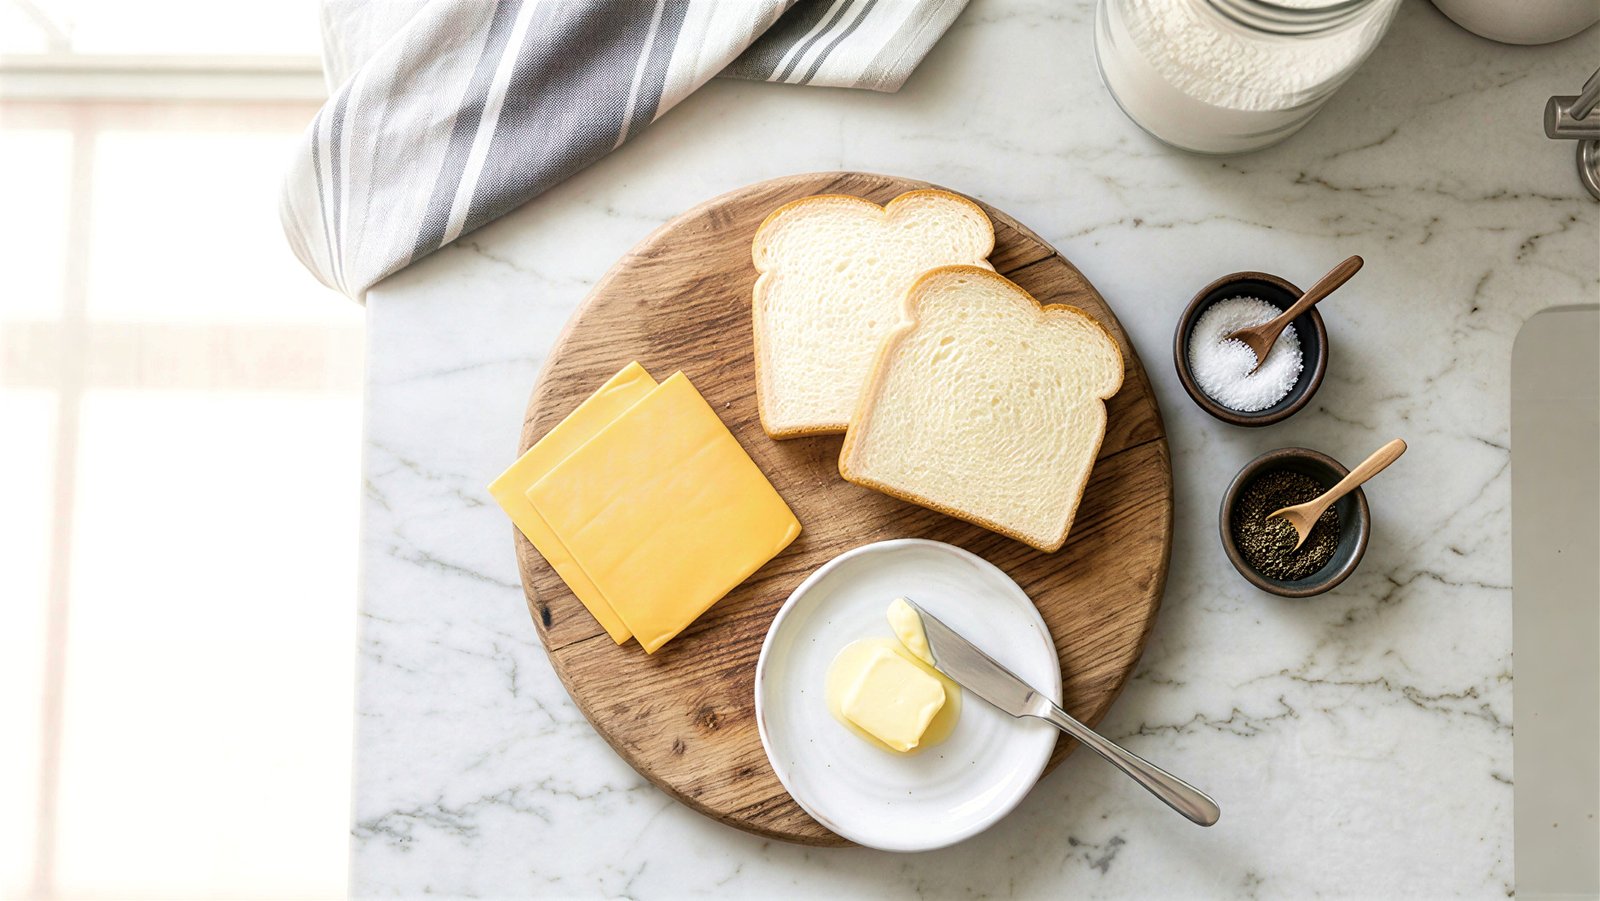 Tip: Any type of bread or cheese works. If you want a cold sandwich, you can skip the butter.
Step 2
-
Build Your Sandwich
Place the cheese between the two slices of bread. Sprinkle a tiny pinch of salt and black pepper if you want a little extra flavor.
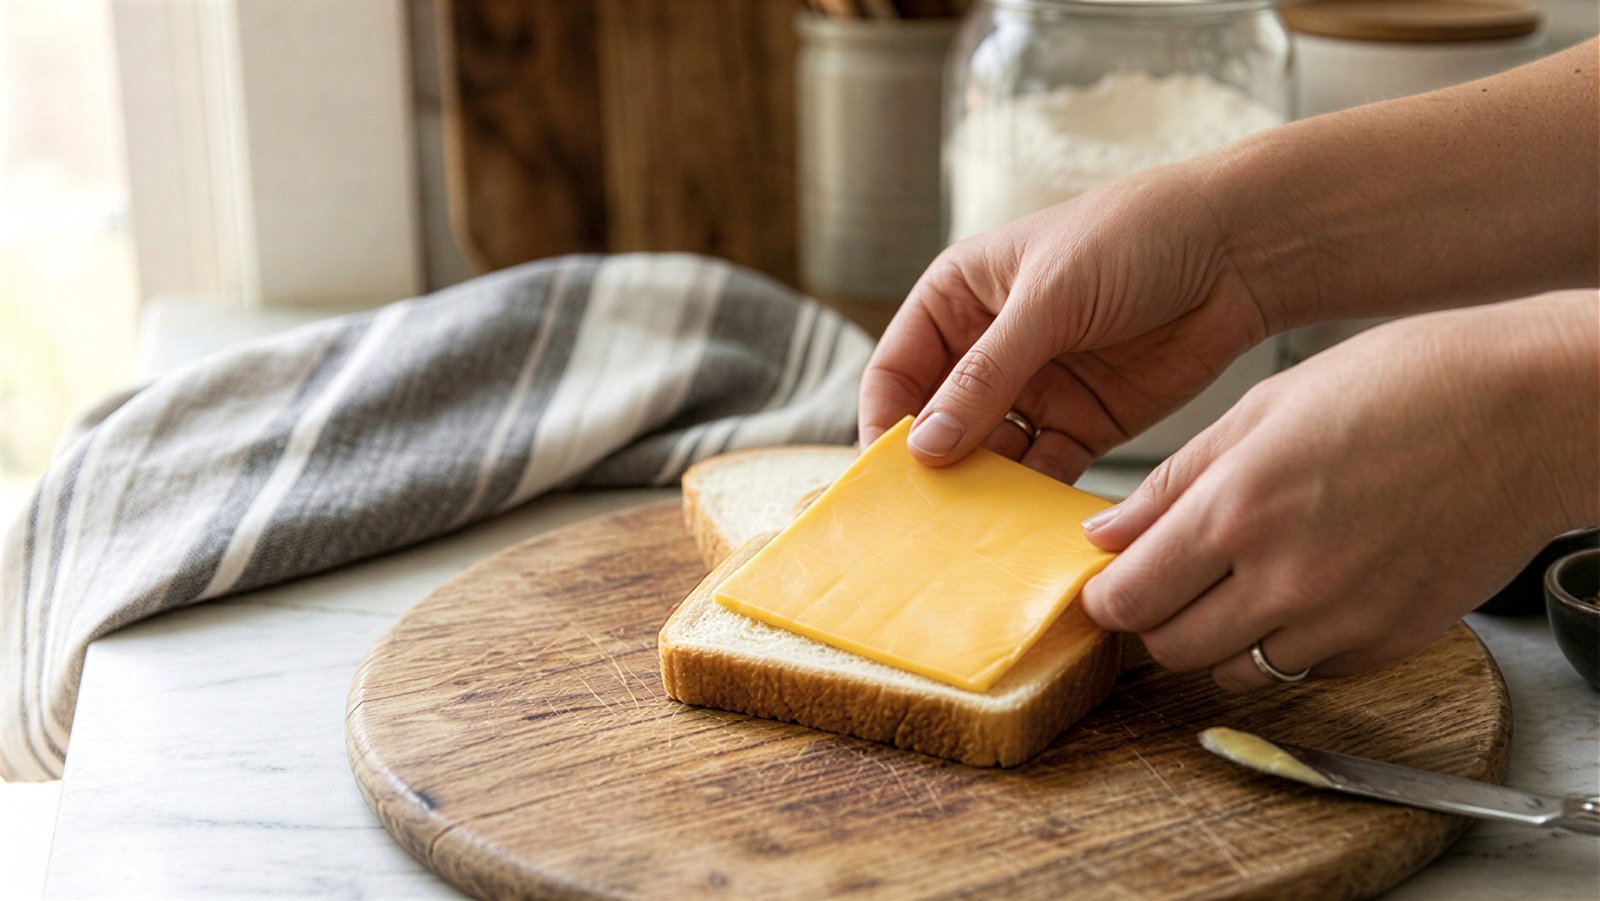 Tip: Make sure the cheese is fully inside the bread so it doesn’t slide out while eating.
Step 3
-
Toast or Keep It Cold
-
Cold Version: Just eat it as is—super quick and easy.
-
Hot Version: Spread butter on the outside of the bread. Heat a pan on medium. Cook the sandwich for 2–3 minutes on each side until golden brown.
Tip: Medium heat is key so the bread doesn’t burn. Flip carefully with a spatula. -
Step 4
-
Cut and Serve
Take the sandwich off the pan, let it sit for about a minute to cool slightly, then cut it in half. Serve and enjoy!
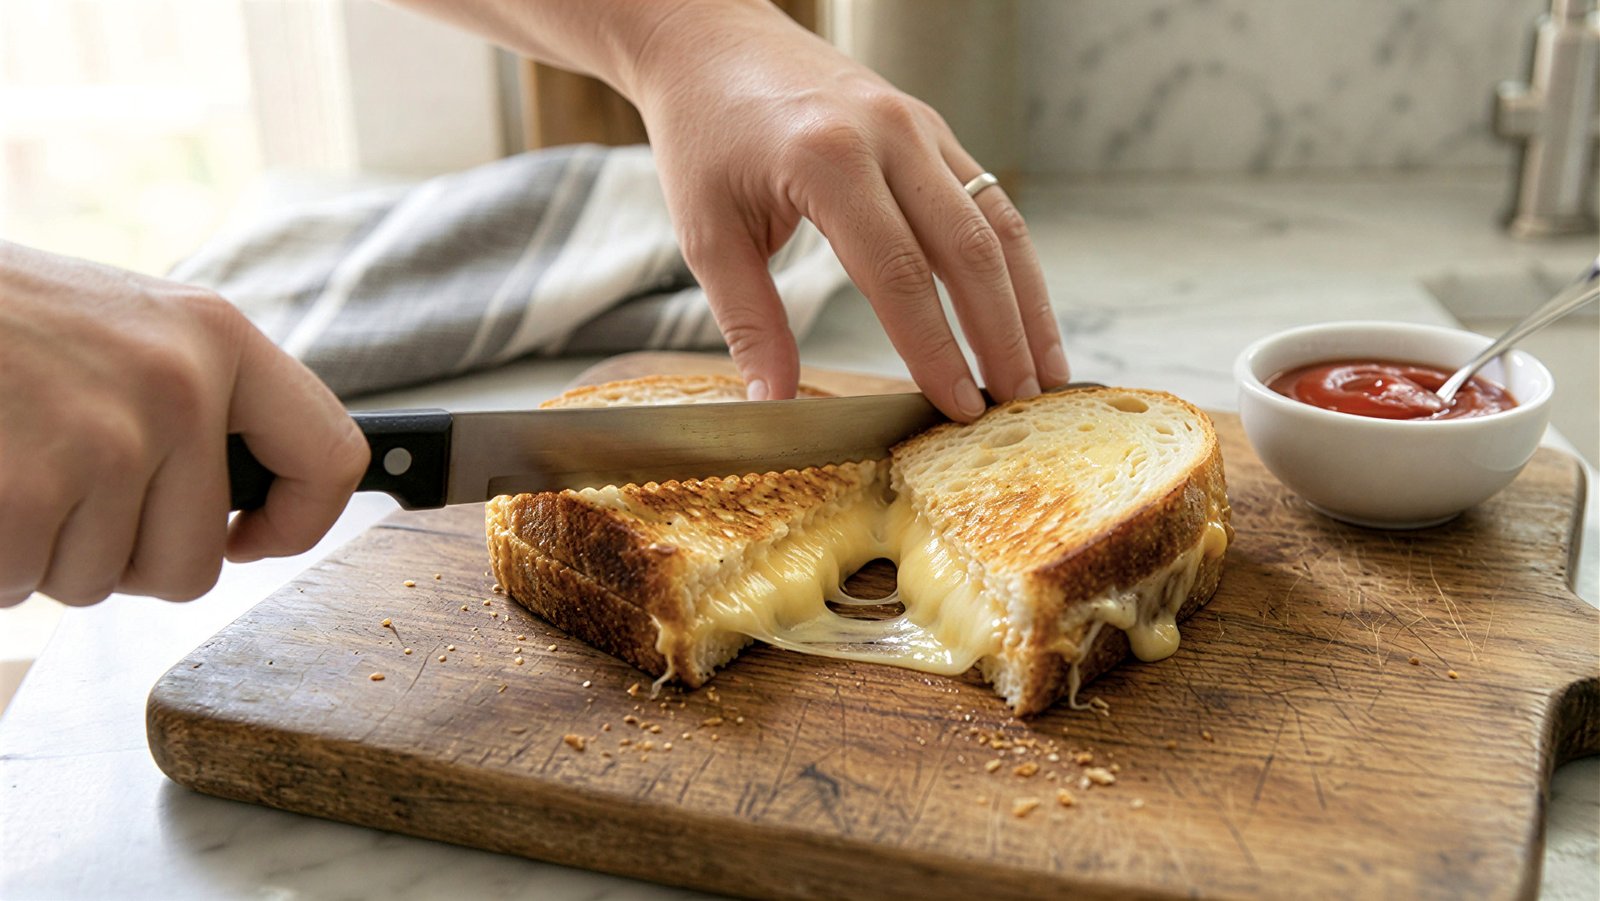 Tip: Use a butter knife to cut safely. You can add ketchup, tomato slices, or lettuce if you like.
Nutrition Facts
Servings 1
- Amount Per Serving
- Calories 300kcal
- % Daily Value *
- Total Fat 15g24%
- Saturated Fat 8g40%
- Trans Fat 0.5g
- Cholesterol 30mg10%
- Sodium 550mg23%
- Potassium 150mg5%
- Total Carbohydrate 30g10%
- Dietary Fiber 1g4%
- Sugars 4g
- Protein 12g24%
- Vitamin A 500 IU
- Calcium 200 mg
- Iron 1 mg
- Vitamin D 40 IU
- Vitamin E 0.5 IU
- Vitamin K 1 mcg
- Thiamin 0.2 mg
- Riboflavin 0.3 mg
- Niacin 2 mg
- Vitamin B6 0.1 mg
- Folate 40 mcg
- Vitamin B12 0.9 mcg
- Biotin 2 mcg
- Pantothenic Acid 0.5 mg
- Phosphorus 180 mg
- Iodine 25 mcg
- Magnesium 20 mg
- Zinc 1 mg
- Selenium 6 mcg
- Copper 0.1 mg
- Manganese 0.2 mg
- Chromium 1 mcg
- Molybdenum 2 mcg
- Chloride 220 mg
* Percent Daily Values are based on a 2,000 calorie diet. Your daily value may be higher or lower depending on your calorie needs.
Note
1.Room Temperature Cheese: Let your cheese sit out for a few minutes before cooking. It melts more evenly than cold cheese straight from the fridge.
2. Even Bread Slices: Make sure both slices of bread are similar thickness so the sandwich cooks evenly.
3. Use a Non-Stick Pan: Beginners will have less sticking and easier flipping if they use a non-stick skillet or griddle.
4. Press Gently: While cooking, press lightly on the sandwich with a spatula to help the cheese melt without squishing the bread.
5. Avoid Overcrowding: If cooking multiple sandwiches, leave space between them in the pan so heat distributes evenly.
6. Cut Diagonally: Cutting your sandwich diagonally makes it easier to hold and looks more appealing.
7. Check Browning: Peek under the bread with a spatula instead of guessing — this helps avoid burning.
8. Cool Slightly Before Eating: Let the hot sandwich sit 30–60 seconds after cooking; the cheese firms up slightly and reduces burns.
9. Butter the Pan, Not the Knife: If spreading butter, use a clean knife to avoid tearing the bread and ensure smooth coverage.
10. Experiment With Cheese Types Later: Start simple with American or cheddar, then try mozzarella, pepper jack, or Swiss for flavor variety once you’re comfortable.